Chapter 9 Form Letters, Linking and other stuff

Contents
Chapter 9 Form Letters, Linking and other stuff
Protected
Word Documents (Forms)
Linking
a Spreadsheet Range or Chart to a WORD document
Protected Word Documents (Forms)
I talked about protecting a spreadsheet (in earlier
chapters) so that a person can only enter in information in the unlocked cells.
You can do the same thing in a word processing document. Let us use an
Insurance document for Wilderness
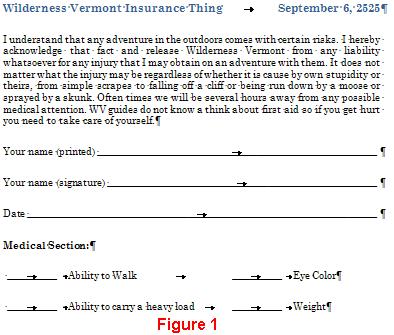
The actual form is a little bigger but all the information is about the same. What I want to do is, instead of filling this form out on paper, I want to fill this form out on the computer. I can then save the file as the person’s name who signed it along with the printed copy that is actually signed.
What I am going to do is to delete the tab key pressed for ‘Your name (printed)’ and insert a form field. In order to do this I need to show the Developer Tab. Right Click the Microsoft Office Button, choose Customize Quick Access Toolbar, then click Word options and look for Popular. Check Show Developer Tab in the Ribbon. This will give you a new tab and let’s look at the Controls Group.
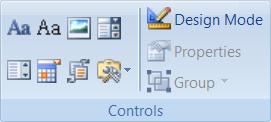
As you can see we can insert several types of controls into
our form. I am going to delete the tab mark on my document and click on the
Text button ![]() icon. This will replace the tab with a Text Form Field. Now you can set the
properties for your form field by clicking the properties button.
icon. This will replace the tab with a Text Form Field. Now you can set the
properties for your form field by clicking the properties button.
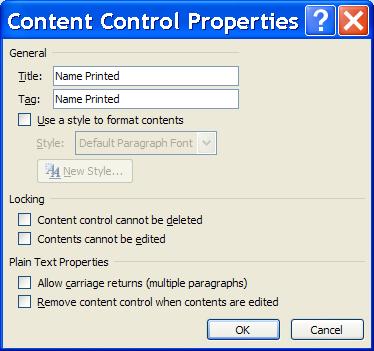
 In the case of a persons name I just set
the title. I left the signature as is
since this form should be printed and physically signed. However some of it can
be done on a computer first. For the
date I clicked on the Date Picker icon
In the case of a persons name I just set
the title. I left the signature as is
since this form should be printed and physically signed. However some of it can
be done on a computer first. For the
date I clicked on the Date Picker icon![]() .
.
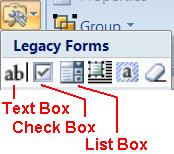
Now the Medical section you will do a little different. Instead of having a text field I wanted to put in a check box field. I need to use the Legacy Tools Icon and clicked on the check box.
All these controls are groovy and feel free to play around with them. However the next step would be to protect the document so that the user can only enter text into the places that we want them to.
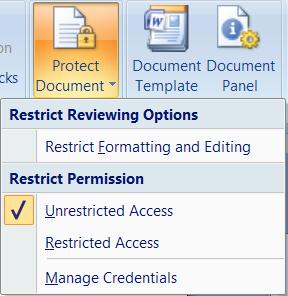 What
you need to do is to click on the protect document icon can choose Restrict
Formatting and Editing. This will give you a side menu where you need to
restrict users to Filling out the Form.
Once you click on Yes start protecting you can see how things will work.
What
you need to do is to click on the protect document icon can choose Restrict
Formatting and Editing. This will give you a side menu where you need to
restrict users to Filling out the Form.
Once you click on Yes start protecting you can see how things will work.
Linking/Copying
You can link or copy a spreadsheet range or chart very easily into a WORD document. The difference between linking and copying is that when you link the spreadsheet or chart, any changes you make to the original will also be made on the linked version. When you copy a spreadsheet or chart, any changes you make to the original will NOT be made on the copied version.
Linking
a Spreadsheet Range
To link a spreadsheet range or chart you would follow these simple steps.
1. Open both WORD and Excel.
2. Place the cursor in the WORD document where you want the spreadsheet range or chart to go. I suggest giving it a new paragraph.
3. Activate Excel. Highlight the Spreadsheet or Chart (if the chart is on a sheet by itself you only need to be looking at the chart).
4. Choose Edit, Copy. This will place a copy in the clipboard for you.
5. Activate WORD. You should have the cursor in the correct place.
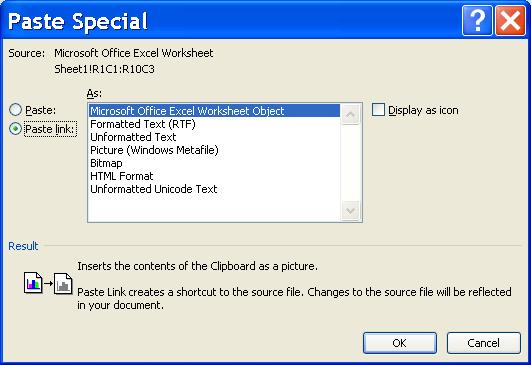
6. Choose
Edit, Paste Special, Paste Link and choose the correct
type of link if it is not already chosen. In the dialog box shown in
Figure 10, I pasted a link to a
Pretty easy to do. If you want to just have a copy follow the same steps only in Step 6 choose Edit, Paste.
Linking Two WORD documents
 To link two
word processing documents together you can follow the same simple steps as
listed above for linking a spreadsheet to a word file. One reason why you may
want to link a document is that you have a company header that you want
everyone to use. You can have the company header on a common directory and
everyone can than simply link the company header to their files. This way you
can change the header in one place and it will change everyone’s document. The
easiest way to link the file is to choose the Insert Object Icon
To link two
word processing documents together you can follow the same simple steps as
listed above for linking a spreadsheet to a word file. One reason why you may
want to link a document is that you have a company header that you want
everyone to use. You can have the company header on a common directory and
everyone can than simply link the company header to their files. This way you
can change the header in one place and it will change everyone’s document. The
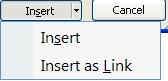
easiest way to link the file is to choose the Insert Object Icon ![]() and choose Text From File ….
and choose Text From File ….
You just find your document and then choose the Insert Link option.
Form Letter
You can link a word
processing file with a database file as a form letter. You have most likely
received a form letter in the mail before. They are pretty easy to make. You
need two things, a database file with the fields that you want in your letter
and a word processing document with all the rest. For our example I am going to
use the MEMO.DOC from the word processing chapter and the Database file
WILDERNESS
You can add a new field to your data table by simply choosing table design. You then simply add a new field. Keep in mind that if you have 10,000 records that means you will need to enter the new information for that field 10,000 times! Since I did think about making the form letter when I created the database I did not think to put in the trip field. However it was worth my time to add the field as it makes my form letter better. Besides I only had 10 records and not 10,000!
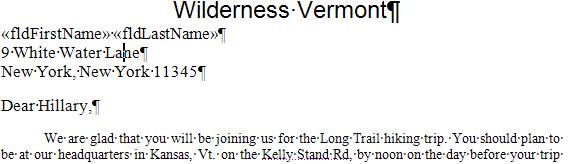
I basically want to send a similar letter to everyone going on a trip with me. Every person needs to be at the headquarters the day before their trip begins no matter what trip they are on. So I can reword this memo as shown in Figure 12, to be a little bit more generic. The text that is underlines is what would be different for each person:
Wilderness
Hillary
Dear Hillary,
We are glad
that you will be joining us for the Long Trail
hiking trip. You should plan to be at our headquarters in
We will be
heading out to the trailhead at
I actually
just got back from a great 7 day excursion in the Lye Brook Wilderness area
with one of our guides, Shelby. We had a great time watching several moose in
the meadows area.
We are all
looking forward to seeing you when you arrive at our headquarters. Be sure to
get those hiking shoes broken in!
Happy Trails,
Your name
Wilderness
Figure 12
We could make this into a FORM and type in the information as we need to. However it would be easier just to create FORM LETTER and use a mail merge instead. What we want to do is replace the red text with a field place holder representing the field in the database where we can get that information from. Before you begin it is best to be sure that you have all the fields in your database that you want to use in the form letter. Again I had to go back and add a field that I had forgotten (trip).
 Okay
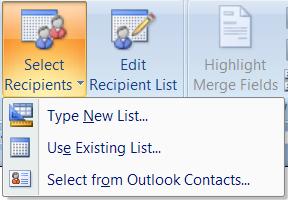
let’s create a Form letter. We do this from the word processor. Choose the Mailings tab, Start Mail Merge Group, Select
Recipients and Use Existing List
since our information will come from a database. This will open a Select Data
Source dialog box and you just need to find your database file. Once you choose
it you then choose the table or query that you want your information to come
from.
Okay
let’s create a Form letter. We do this from the word processor. Choose the Mailings tab, Start Mail Merge Group, Select
Recipients and Use Existing List
since our information will come from a database. This will open a Select Data
Source dialog box and you just need to find your database file. Once you choose
it you then choose the table or query that you want your information to come
from.
At this point we
simply delete Hillary and leave the cursor on that paragraph. When you click
the Insert Merge Field icon![]() you will see a list of the fields that you have available. Choosing a field
will put in a place holder for that field into the document. You would need to
hit the space bar once to get a blank space between first and last name
you will see a list of the fields that you have available. Choosing a field
will put in a place holder for that field into the document. You would need to
hit the space bar once to get a blank space between first and last name
You just need to keep doing this for the rest of the address. Don’t forget that if you want a comma between city and state, you will have to type in the comma between the field place holders. The last field that I want to insert is to replace trip with the field place holder that will put in the name of the trip that person has signed up for. This will create a nice personalized form letter (if such a thing exists).

Groovy go ahead and choose print preview. Hmm. It seems print preview shows the place holders. Guess what, if you print the document the placeholders will print. Remember there were 3 steps. We just finished step 2. There are a couple of ways to do step 3. The easiest way is to simply click on the View Merged Data button on the toolbar as shown in Figure 19. Or you could go back into Tools, Mail Merge.
Your document will now have the data in place of the field placeholders as in Figure 20. Pretty neat stuff.
